This procedure allows you to configure and verify a custom domain for sending emails through Azure Communication Services.
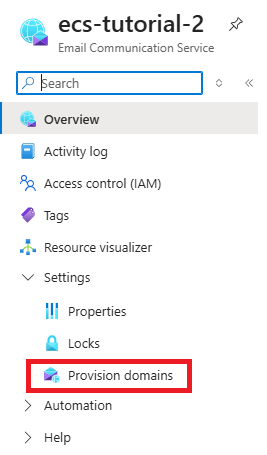
In the left-hand menu, select:
Settings > Provision Domains
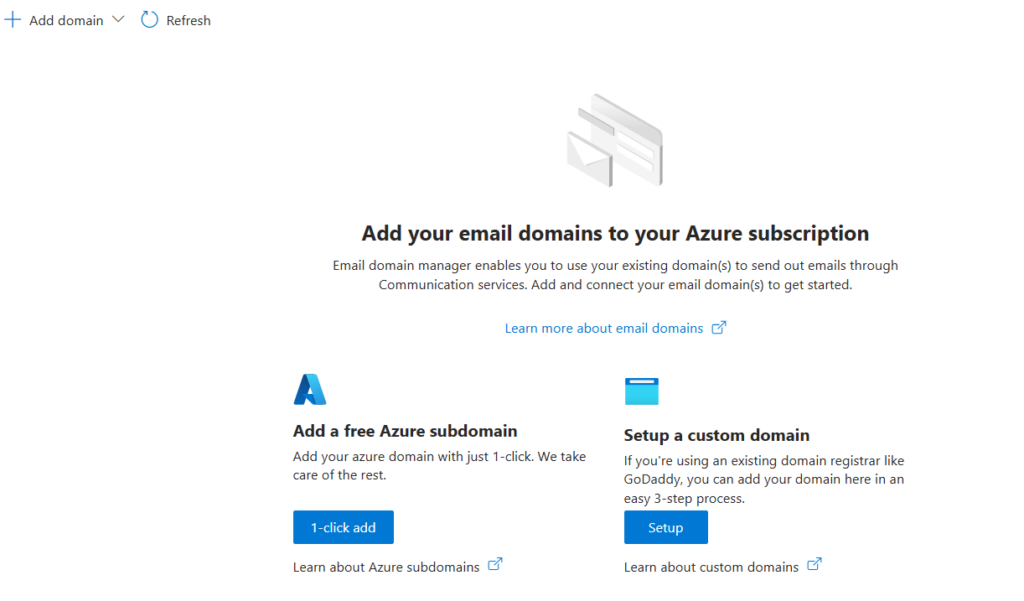
On the configuration screen, you can choose between two types of domains:
- Custom: allows you to use a company domain (recommended option).
- Azure-generated: allows you to use a domain automatically created by Azure.
Select Custom.
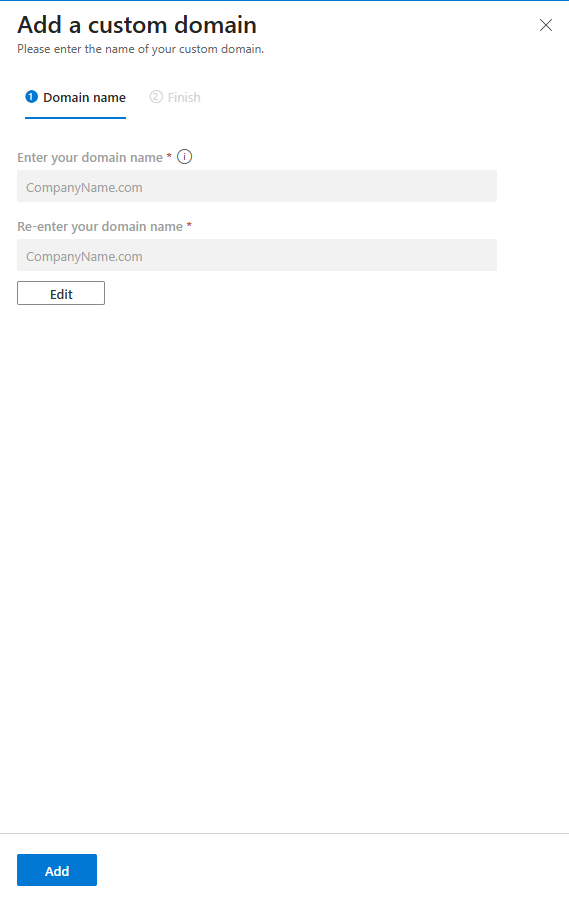
In the right-hand panel that appears, fill in the following fields:
- Domain Name: enter the domain name and confirm it
- (Recommended: email.<companyname>.com)
Click Confirm, then Add to start the creation of the domain.
Wait for the process to complete.
Once the domain has been created, click Verify.
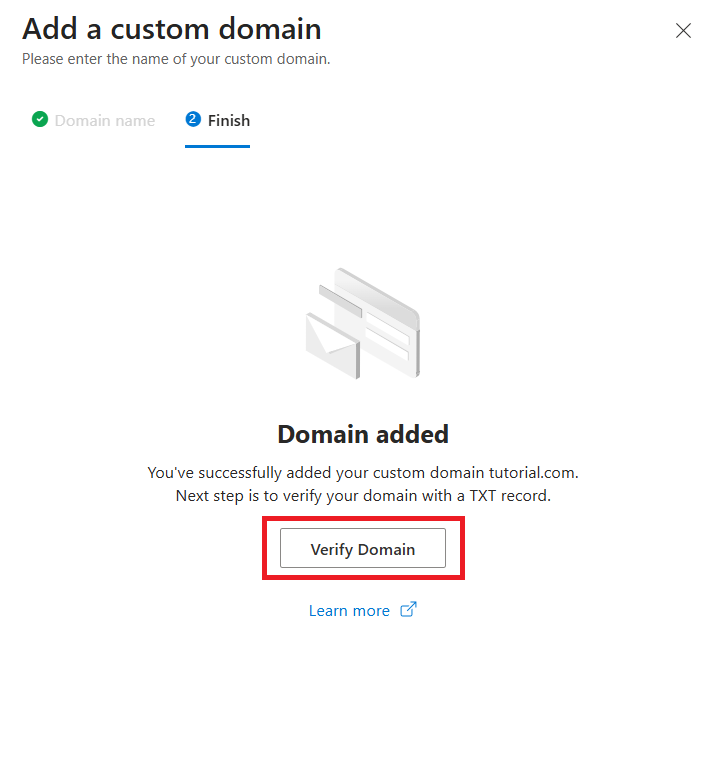
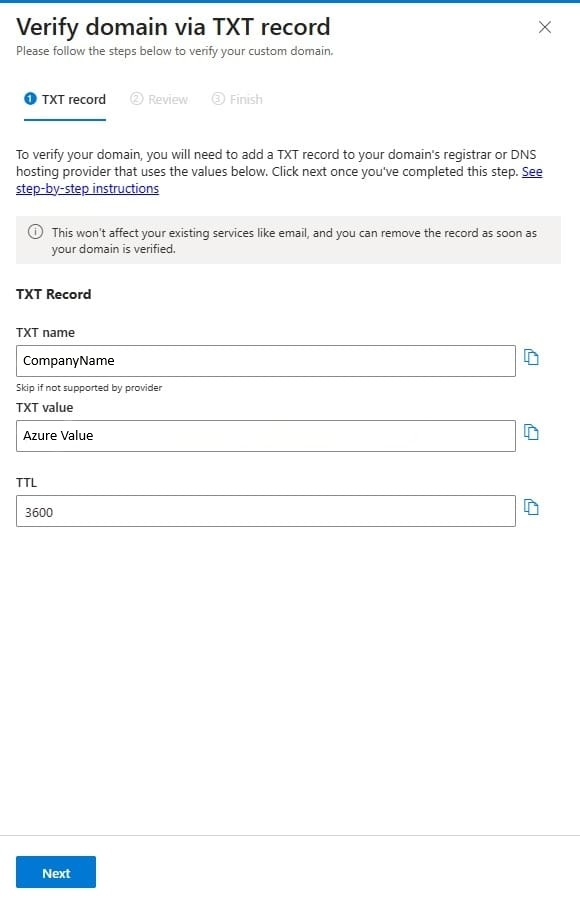
Before proceeding with Next and Done in Azure, you need to configure the DNS records at the provider where the domain is registered (for example, Register.it, Register.com, Aruba, etc.).
Access the domain’s DNS management and create a new record:
- Type: TXT
- Name / Host: as specified by Azure
- Value / Content: value provided by Azure
- TTL: leave the default or automatic value
Save the record.
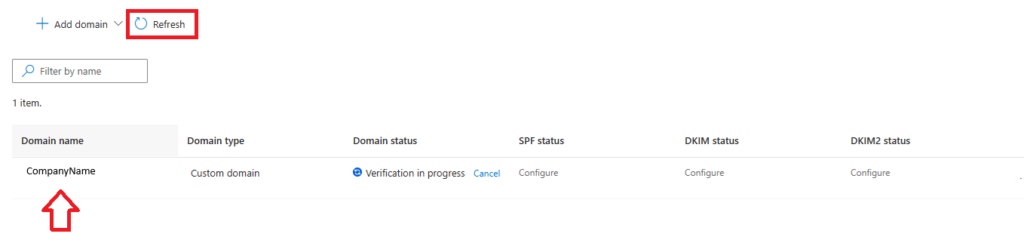
Only after the DNS record has been saved correctly:
Return to Azure and click Next, then Done to complete the initial verification.
Close the panel by clicking the X and press Refresh to update the list of domains.
Note: DNS propagation may take approximately 15–20 minutes before the domain is verified.
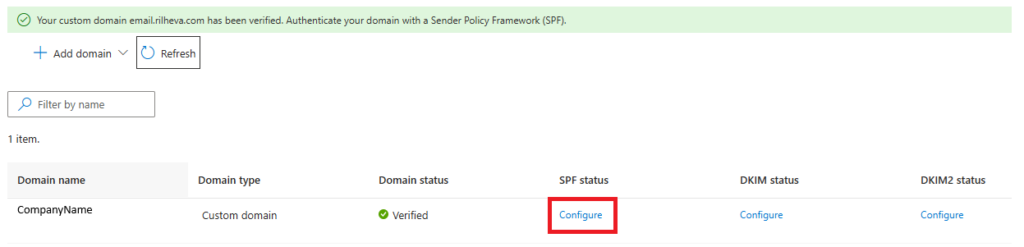
Under the SPF Status section, click Configure to properly set up the email authentication records.
In the side panel that opens, configure the following DNS records at the domain registrar:
Record SPF (TXT)
- Type: TXT
- Name / Host: as specified by Azure
- Value / Content: SPF value provided by Azure
Record DKIM 1 (CNAME)
- Type: CNAME
- Name / Host: selector1-azurecomm-prod-net._domainkey.<configured domain>
- Value / Target: value provided by Azure
Record DKIM 2 (CNAME)
- Type: CNAME
- Name / Host: selector2-azurecomm-prod-net._domainkey.<configured domain>
- Value / Target: value provided by Azure
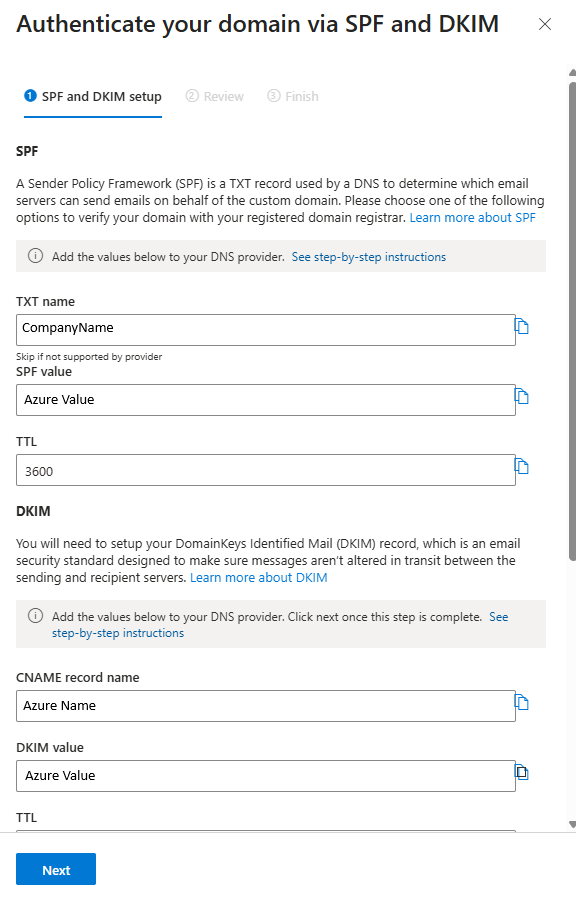
Save all the configured DNS records.
Only after they have been saved correctly:
Return to Azure and click Next, then Done to complete the domain configuration.
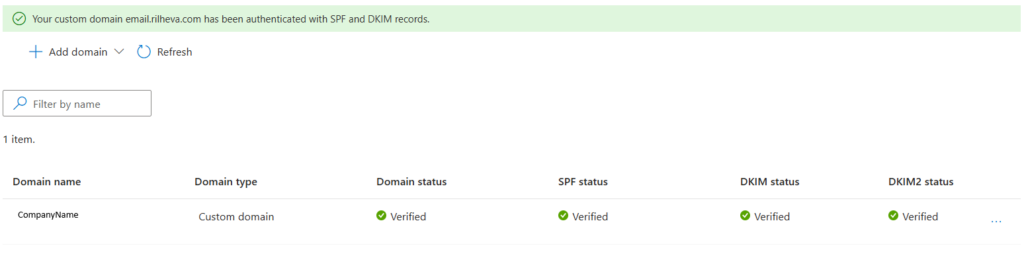
If DNS propagation has occurred successfully, the following statuses will be displayed in the Azure screen:
- Domain Status: verified
- SPF Status: verified
- DKIM Status: verified
- DKIM2 Status: verified
Was this helpful?
0 / 0