This procedure allows you to create an application in Microsoft Entra ID and generate the client credentials required for authentication.
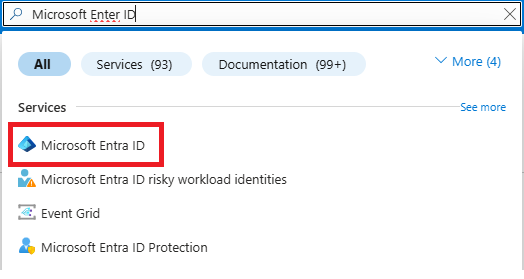
In the Azure portal search bar, type Entra ID and select Microsoft Entra ID from the displayed results.
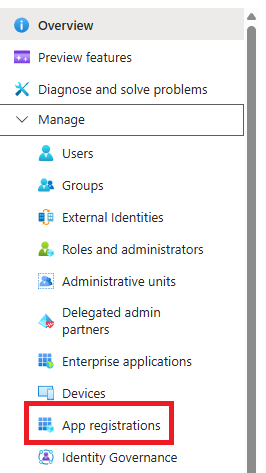
In the left-hand menu, select:
- Manage > App Registrations
to access the list of registered applications.
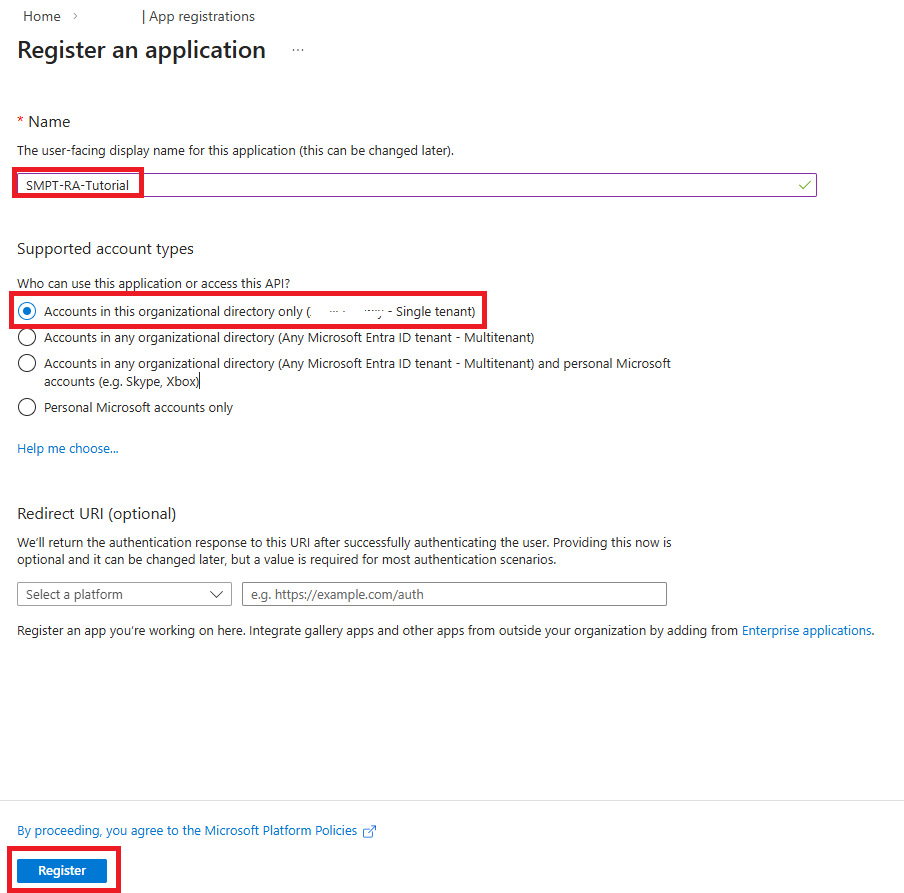
On the App Registrations page:
Click New Registration to start creating a new application.

NOn the configuration screen, fill in the following fields:
- Name: enter an identifying name for the application
- Account Type: select Accounts in this organizational directory only
Once the form is complete, click Register.
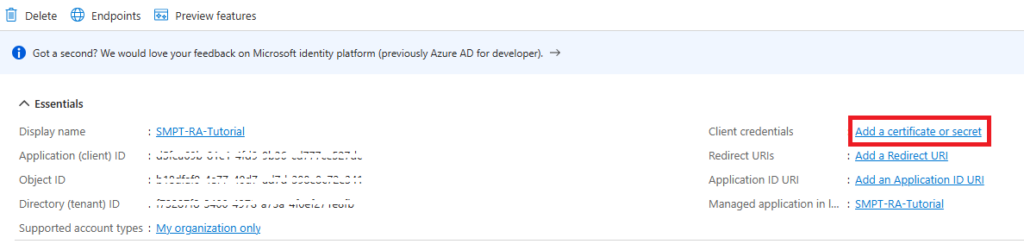
Wait for the application creation to complete.
Once completed, the application details page will be displayed.
At the top right, in the Client Credentials section, select:
- Add Certificate or Secret
On the next screen:
Select New Client Secret to create a new secret-type credential.

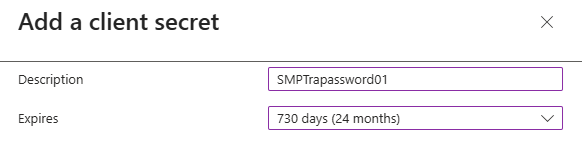
In the side panel that opens, fill in the following fields:
- Description: enter an identifying description for the secret
- Secret Expiration: select a duration of 3, 6, 12, or 24 months
Click Add to confirm the creation of the credential.
Note: when the secret expires, it will be necessary to generate a new credential and update the configuration data to ensure the proper functioning of the service.
Once the client secret has been created:
Take note of the value shown in the Value column, which represents the generated password.
This information will be required for subsequent configurations.

Warning: the secret value is only visible once at the time of creation. It is therefore essential to copy and store it securely, as it cannot be retrieved later.
Was this helpful?
0 / 0