This procedure allows you to create a custom role and assign the necessary permissions on the Azure Communication Service resource.
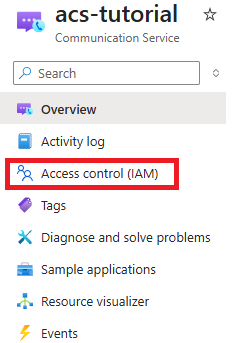
Access the previously created Azure Communication Service resource.
In the left-hand menu, select:
Access Control (IAM)
NOn the IAM screen, select the Roles tab.
Locate the Reader role in the available list.
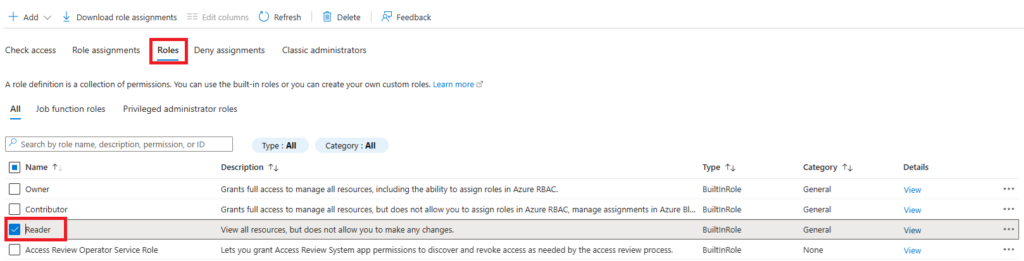
Select the checkbox next to the Reader role, then click the three dots on the right side of the row.
From the displayed options, select Clone to create a new role based on the existing one.

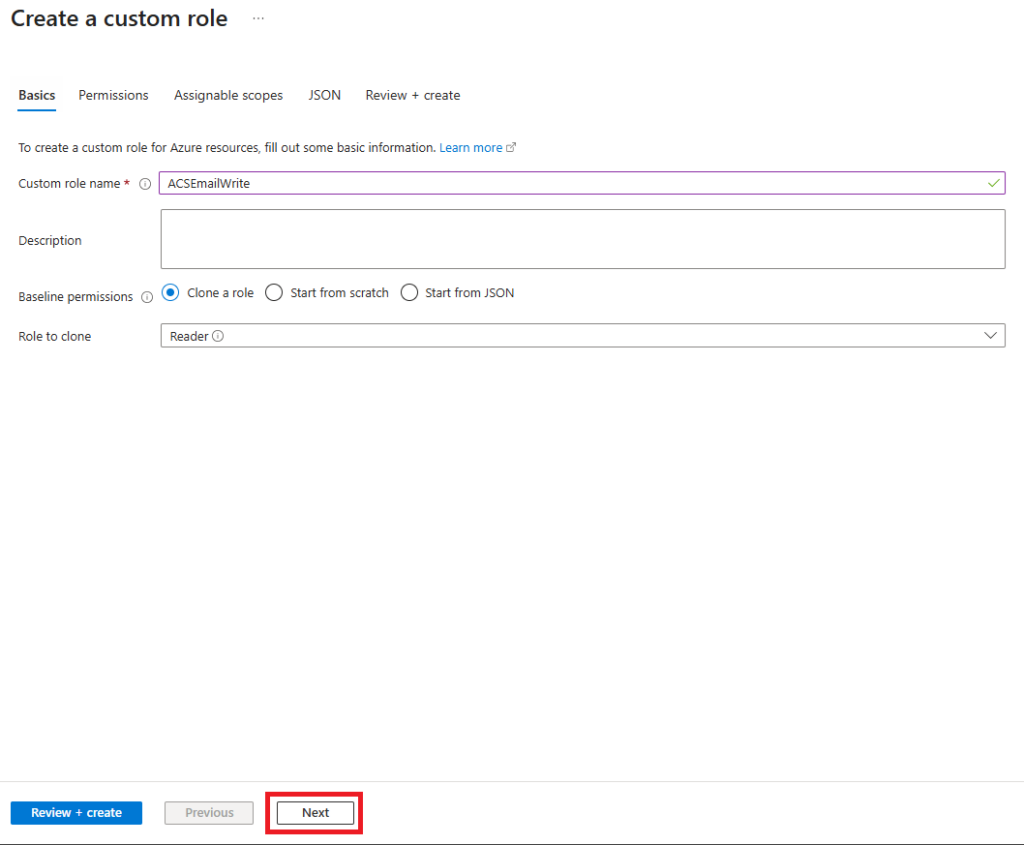
On the configuration screen for the new role:
- Name: enter an identifying name for the custom role
Leave the other fields with their default values and click Next.
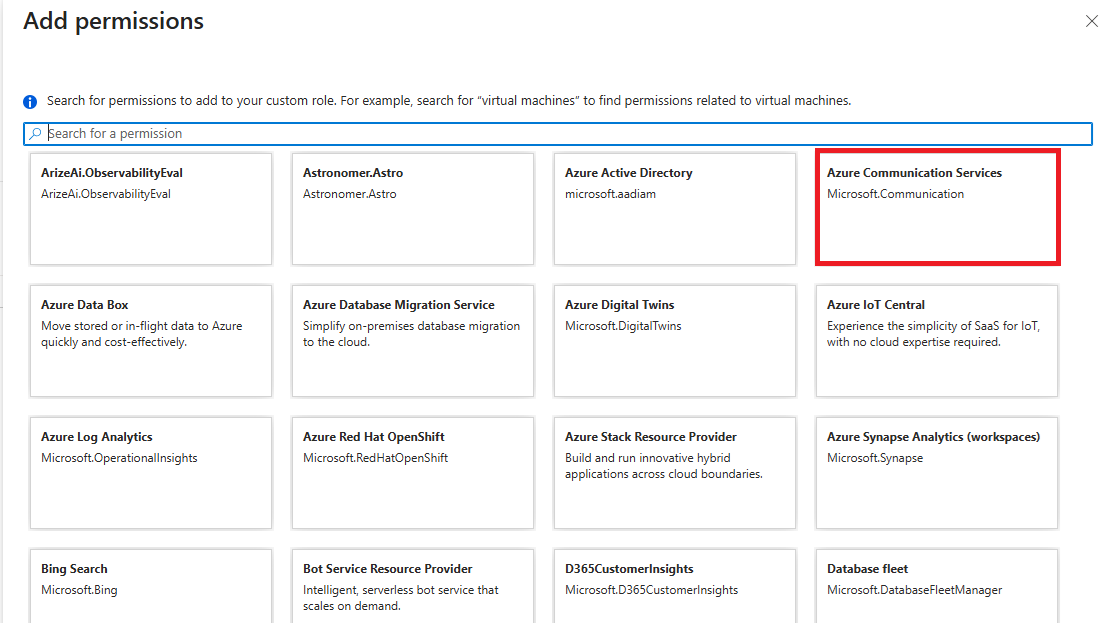
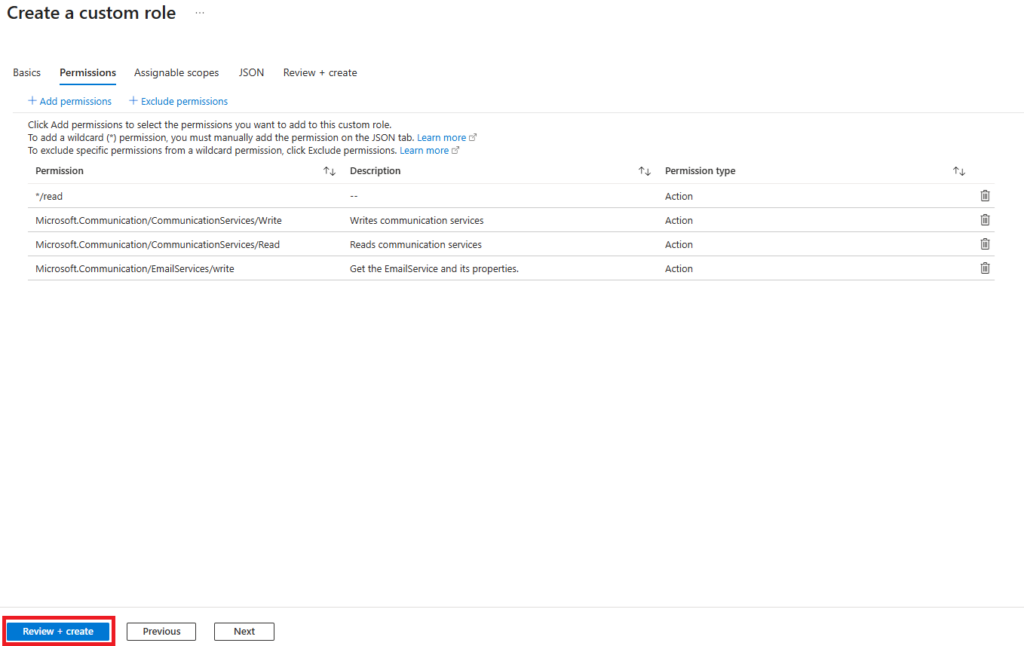
In the Permissions section:
Click Add Permission to configure the permissions.

In the side panel that opens, select:
Azure Communication Service
Access the item:
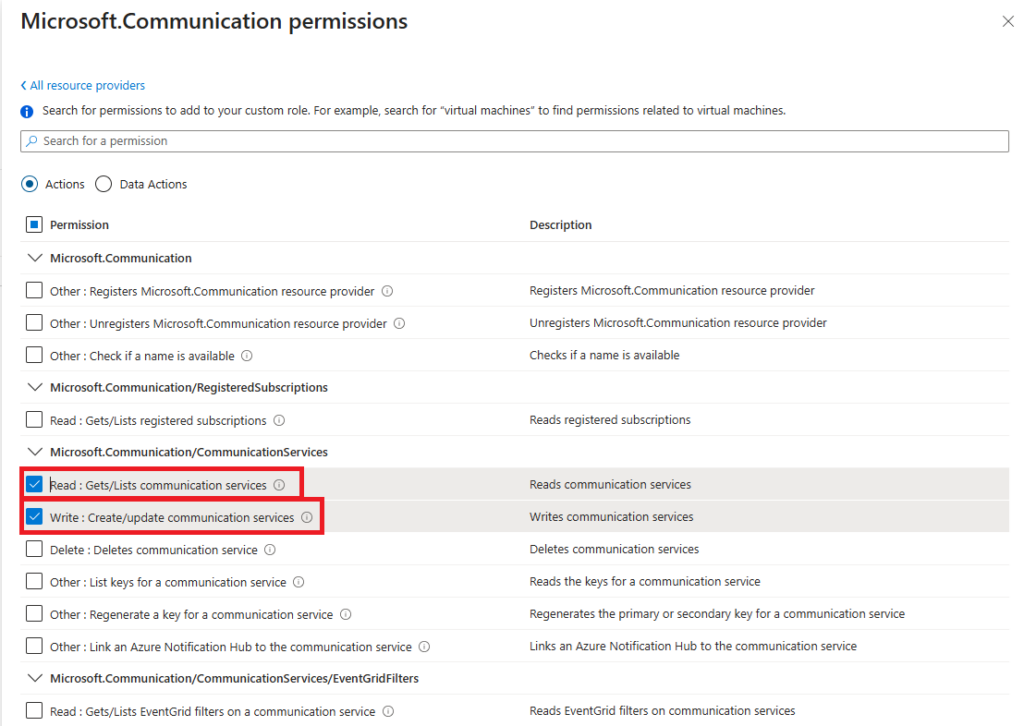
Microsoft.Communication/CommunicationServices and select the following permissions:
- Read: Gets/Lists communication service
- Write: Create/Update communication services
Scroll down to the section:
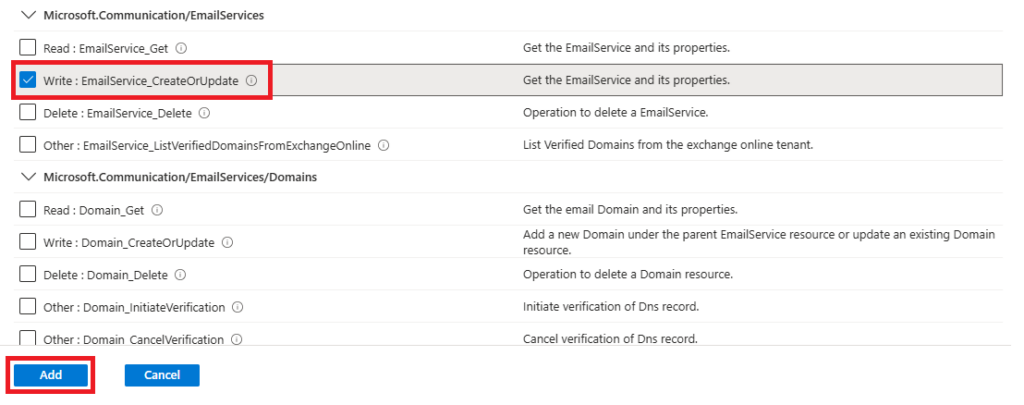
Microsoft.Communication/EmailServices and select the permission:
- Write: EmailService_CreateOrUpdate
Once the permissions are selected, click Add to confirm.
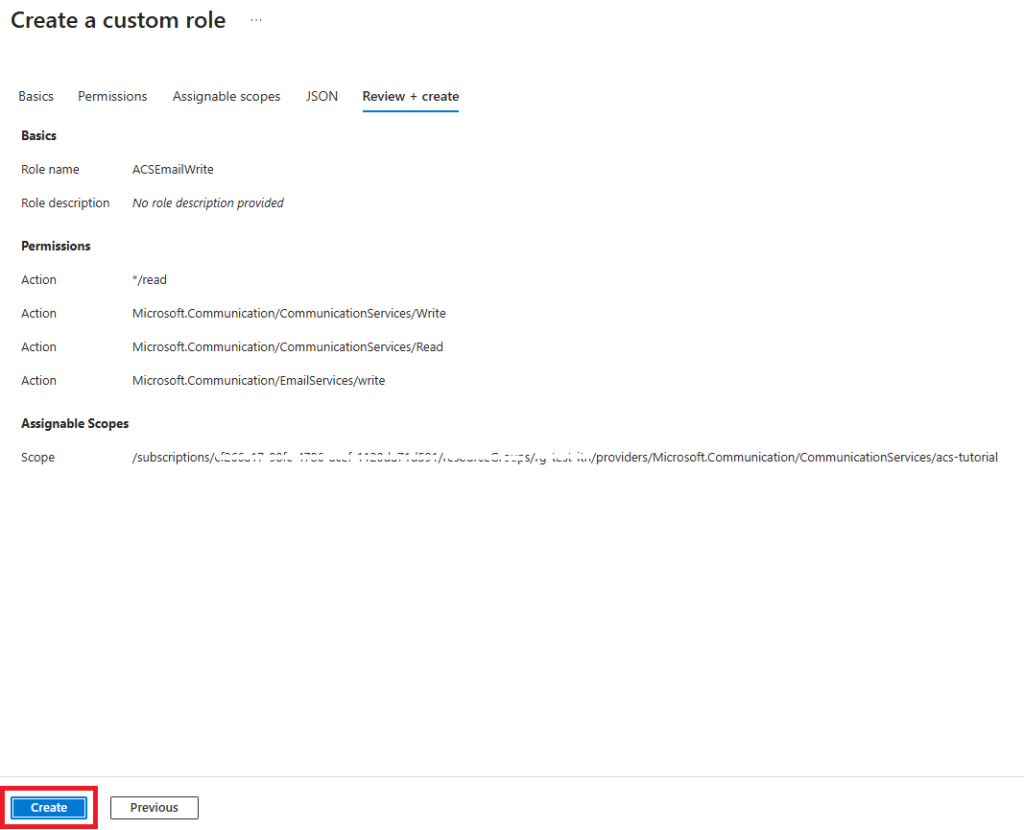
Select Review + Create to verify the configuration.
Click Create to finalize the role creation.
Wait a few minutes for the operation to complete.
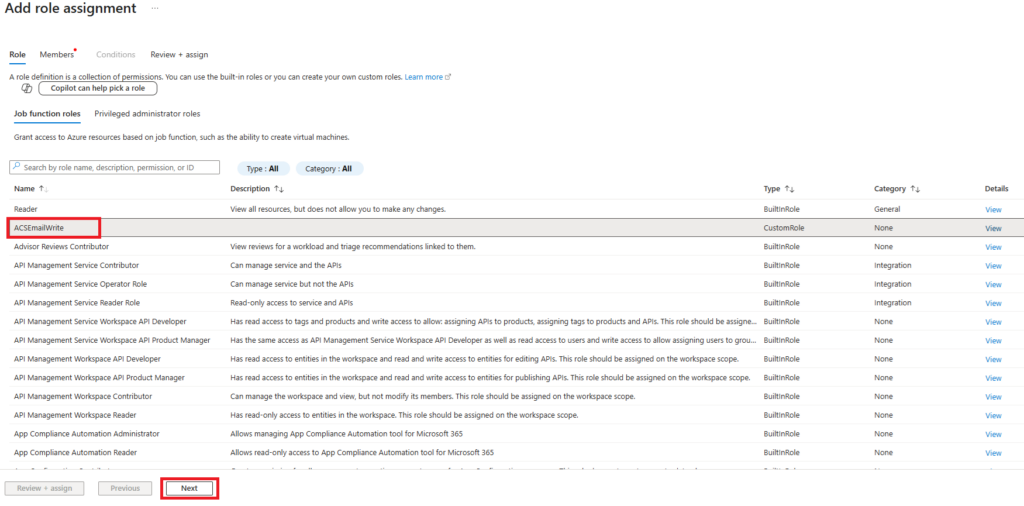
Once the role has been created, on the IAM screen select Add, and then Add Role Assignment.

In the wizard, select the custom role created previously.
Click Next to continue.
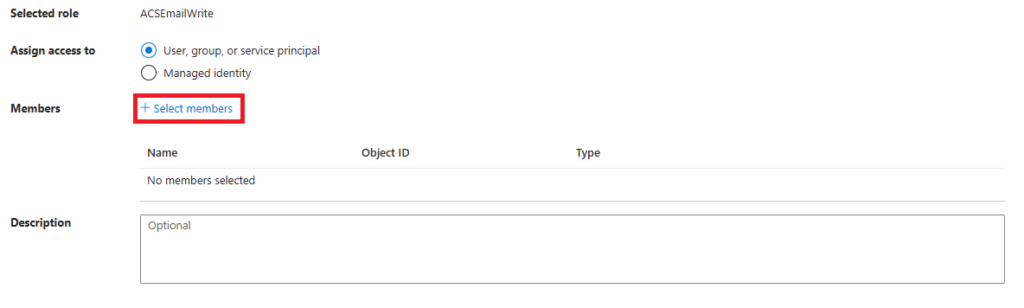
Select Select Members to specify who will be assigned the role.
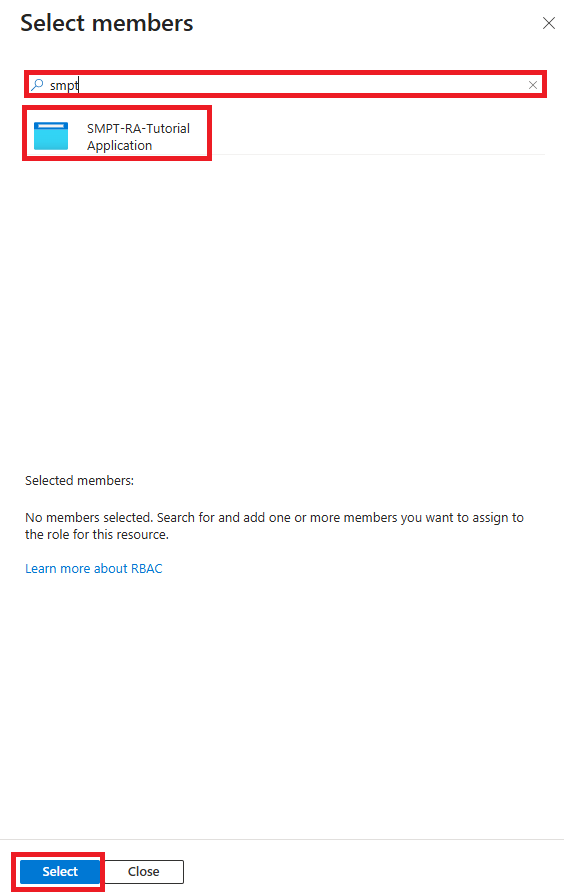
In the search bar, type the name of the previously registered application.
Select it from the list and click Select to confirm.
To complete the assignment:
Click Review + Assign
Confirm again by clicking Review + Assign

Wait for the confirmation notification indicating that the role has been successfully assigned.
Was this helpful?
0 / 0